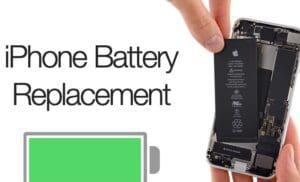
Repairing the back glass of an iPhone yourself can be a challenging task, especially since it involves a risk of further damage to the phone. If you choose to proceed with a DIY repair, it’s essential to proceed with caution and use the right tools. Here’s a basic guide on how to attempt a DIY back glass repair for an iPhone:

Tools Needed:

  • Heat gun or a hair dryer
  • Suction cup
  • Pry tools (plastic and metal spudgers)
  • Safety glasses and gloves
  • Replacement back glass
  • Adhesive for resealing

Steps to Replace the Back Glass:

  1. Prepare Your Workspace: Make sure your workspace is clean, well-lit, and free of static. Have all your tools readily accessible.
  2. Power Down Your iPhone: Ensure your iPhone is completely powered off before starting the repair.
  3. Heat the Back Glass: Use a heat gun or hair dryer to evenly heat the back glass. This helps to loosen the adhesive holding the glass in place. Be careful not to overheat as this can damage internal components.
  4. Create an Opening: Once the adhesive is softened, use a suction cup to lift the glass slightly. You might need to use a razor blade to create an initial gap. Insert a plastic spudger to prevent the glass from resealing.
  5. Remove the Broken Glass: Gradually work around the edge of the iPhone with plastic and metal spudgers, gently prying up the broken glass. Take your time to avoid damaging the wireless charging coil or the camera.
  6. Clean the Chassis: Once the broken glass is removed, clean any remaining adhesive from the frame. Be thorough, as any leftover glass or adhesive can make seating the new glass difficult.
  7. Apply New Adhesive: Apply a new adhesive to the frame where the old adhesive was located. Some replacement glasses come with pre-applied adhesives.
  8. Install the New Back Glass: Carefully align the new back glass with the frame and press it into place. Ensure that it’s evenly seated.
  9. Seal and Cure: Apply gentle pressure to the glass to ensure good adhesive contact. You might need to apply heat again to help the adhesive set. Let the adhesive cure as recommended before using the device.
  10. Testing: Once the back glass is installed and the phone is reassembled, power on your iPhone and perform a full functionality test to ensure everything is working properly.

Caution:

  • Risk of Further Damage: If not done correctly, you risk damaging your phone further, which could be more costly than the initial repair.
  • Void Warranty: Performing repairs yourself can void the warranty of your iPhone.

Recommendation:

Considering the complexity and risks involved, unless you are very confident in your ability to perform this repair, it may be more prudent to consult a professional repair service. They have the right tools and experience to handle such repairs safely.

Share this post :

Facebook
Twitter
LinkedIn
Pinterest

Leave a Reply

Your email address will not be published. Required fields are marked *

Latest Post

Categories

Subscribe Newsletter

Sign up our newsletter to get update information, news and free insight.